
Focaccia is a classic family pleaser, it’s perfect for any meal and season be it a picnic in the park, a quick lunch paired with some cheese and deli cuts or an evening aperitif. I personally love it on its own, I could finish a whole tray!!
Perfecting focaccia has proved to be a bit of a challenge for me BUT after several attempts, mostly unsuccessful, I finally worked out a recipe that makes the softest of the sourdough focaccia! It’s a no mess and no knead process, it requires quite a bit of waiting but the end result is very yummy.
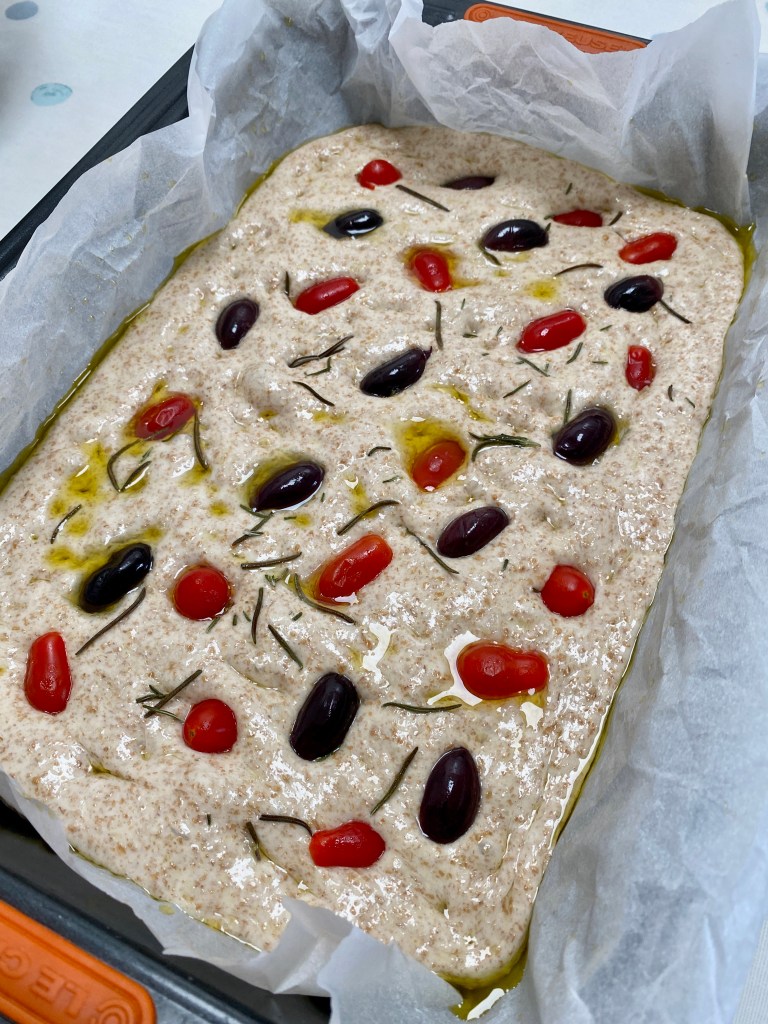
I usually like my focaccia with black Kalamata olives, sweet cherry tomatoes, rosemary and loads of coarse sea salt, I particularly like Maldon salt.

Ingredients
- 200gr Strong bread flour
- 200gr Wholewheat bread flour
- 325gr Water
- 100gr Liquid starter (mature and bubbly)
- 7gr salt
- 2tbsp EVOO (1 for mixing the dough and 1 for baking)
- Toppings such as rosemary, coarse salt, olives, tomatoes etc
Preparation
Day 1
1. Mix both flours with 300gr of water in a bowl using your hands or a scraper, cover and let it rest for 1 hour at room temperature.
This process is usually called autolyse, the length of time of this phase can increase or decrease depending on the room temperature. I would suggest make it slightly shorter of hot days (above 24C) and longer on cold days (below 20/22C)
2. Add liquid starter to the bowl, mix well, cover and wait 15minutes
I use active liquid starter, I usually refresh it few hours before I need to use it and use it once it passes the floating test, i.e. it floats when poured in a bowl with water.
3. Add salt and incorporate it in the flour mix, then add one tablespoon of EVOO and mix until all the it is completely absorbed and the dough comes off the sides of the bowl.
The last step takes a bit of hand work, so make use you keep reading the down in the bowl by stretching it and folding it untile there is not oil in the bowl. I would say this takes about 5 minutes.
4. Once the oil is fully absorbed, bulk fermentation starts. Cover the bowl with lid, I use silicone lids or reusable shower cups, let it rest for 2 hours. During this phase you must stretch and fold the dough in the bowl every 20 minutes.
5. After the last fold, let the dough rest covered for an extra 20 minutes and then put in the fridge overnight.
This last steps allows the dough to relax before its fermentation is slowed down in the fridge, my fridge temperature is about 5C.
Day 2
1. Take out the dough from the fridge and let it get to room temperature for at least 4 hours. The dough warms up, grows and you start seeing bubbles on the surface
2. Cover a baking tray with parchment paper, pour half of the remaining tablespoon of EVOO and spread it with your hands.
I used a 30x40cm baking tray also do not wash your hands after this, you will need your “oily” hands on the next step.
3. Gently pour the dough on the baking tray and delicately stretch it, using your “oily” hands, so to shape it in the baking tray then press your still “oily” fingers into the dough to make dimples.
Make sure to be gentle and not tear the dough, it might take few attempts to extend it to the size of the baking tray.
5. Sprinkle the dough with the remaining EVOO, plenty of coarse salt and garnish to your liking. I used rosemary, black olives and cherries my favourite combo.
6. Let focaccia rest in the baking tray for about one hour, this will allow the dough to raise nicely around the toppings incorporating them.
7. Bake for about 20 minutes in a pre-heated oven at 230C Fan, turning it around after the first 10 minutes. When it is nice and brown, take it out of the oven and let it cool before serving it.
I usually check the focaccia after the first 10 minutes of baking and every 5 minutes after then, turning the tray around every time.

Here is my usual timeline that could help with your planning.
- Day 1
- 6pm – Autolyse
- 7pm – Add Liquid Starter
- 7.10pm – Add Salt & EVOO
- 7.20pm – Bulk fermentation, 1 fold every 20 minutes
- 9.20pm – Last fold and dough rest
- 9.40pm – In the fridge
- Day 2
- 8am – Out of fridge and rest at room temperature
- 12pm – In backing tray, add toppings and final rest
- 1pm – Bake
I am conscious that this focaccia takes a bit of time to make, I tend to let it proof in the fridge overnight as I usually make it at the same time as I make bread. However if you want to make it in one day, you could let it proof for about 2-3 hours, after the bulk fermentation, until you start seeing nice little bubbles on the top of the dough. So you could feed the starter the night before, make the focaccia in the morning and bak it at lunch time or for dinner. I have not done it yet myself, but I will update this post with a ” same day baking” timeline once I do.

This focaccia freezes very well. Let it defrost completely and warm it up in the oven or on a toaster before serving it.
Happy baking and let me know if you have any comments or questions!
If you want to make this recipe and share it on your social media please tag me using @prepandproperrecipes and the tag #prepandproperrecipes

Thank you! Try some chilly flakes too!
Looks delicious! Olives and tomatoes are the perfect toppings for focaccia!